Scheduled Patron Update
The Scheduled Patron Update feature lets you define and schedule updates to your patron records.
|
Important: To set up or run a scheduled patron update, you must be a district-level user with the Manage Patrons for the District permission. |
Before You Begin
Before you begin to set up a scheduled patron update, you need to know:
- The name and location of the .csv file containing your patron data. For details on the .csv file, see Patron Import Converter.
- The character encoding of the .csv file.
- The frequency and the days that your district administration creates the patron data file to be used in Destiny.
Note: If you have multiple patron files, such as one for students, one for faculty, and one for staff, you must set up a scheduled patron update for each file.
Did you use the Patron Import Converter to convert your data?
| If… | Then you need… |
|---|---|
| Yes | The generated properties file. |
| No | To run the Patron Import Converter. |
For more information on messages you may see in the Patron Update Job Summaries, see Common Exceptions in the Update Patrons Job Summary.
Add a Scheduled Patron Update
- Log in as a district user.
- Based on how Destiny is set up at your district, do one of the following:
- Select
 > District Back Office.
 - From the top-right corner, click District.
- Select
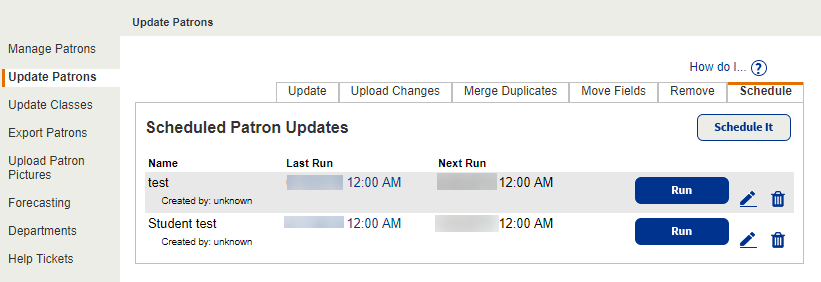
- Select Admin > Update Patrons > Schedule sub-tab.
- Click Schedule It.
- Follow the steps in Add a Scheduled Patron Update.
Run an existing update
- Log in as a district user.
- Do one of the following (depending on how the user experience is set up at your school):
- Select
 > District Back Office.
 - Select District.
- Select
- Select Admin > Update Patrons > Schedule sub-tab.

- Find your job, and then click Run. The Job Manager page appears.
- Review the Job Summary, and proceed accordingly.